DIGITAL PHOTOGRAPHY AND IMAGING - Week 3
WEEK 3 (30 / 04 / 2020 )
Lectures :
Double exposure photography refers to merging multiple images. The goal is to make them surreal, emotional, or humorous. They usually feature silhouettes.
- Using the Tilt-Shift Effect
- Create fake reflection
- Experiment with simple portraits and details textured
- Convert your results to Black & White
- Work with silhouette
- Pick two random photo
- Make simple objects look fascinating
- Use Shadow
A particular blending mode works really well on more difficult subjects like glass, smoke, fire and lightning. Here’s a quick guide to use blending mode :
- Select the Layer 1 (Fire) to be on top of the Background (Musicians)
- Go to the Blending Modes option
- Select “Screen”
- As a result, all of the pixels on the fire will be selected as Screen blending mode

Practical :
Exercise 3
- Recolouring Exercise ( part 1 ) :
Try follow the demo video and recolour the image provided in google drive.

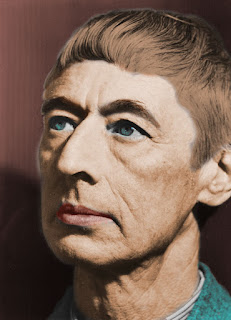
outcome

outcome
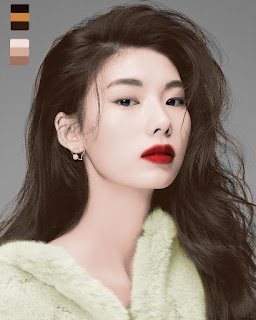
- Recolouring Exercise ( part 2 ) :
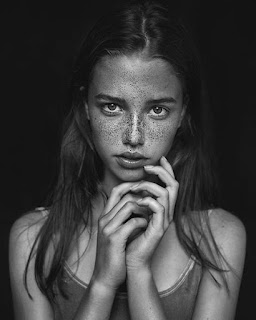
Choose ONE black and white photo, and search photos online for the skin colour and hair colour.
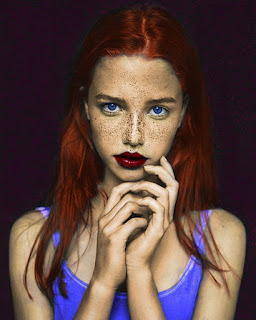
final outcome
Tutorial :
Exercise
- Download the design elements provided .
- Trace and crop the images using the Pen tool.
- Use blending modes to create double exposure effects.
- Create composition.

fig. 1

fig. 2

fig. 3

fig.1 ; outcome

fig.3 ; outcome


Comments
Post a Comment